
Performing a leak check
Every outdoor unit gets its own leak check panel, right there in the checklist — method, result and notes, saved the moment you mark the unit serviced.
Walkthrough
Three steps, one per outdoor unit.
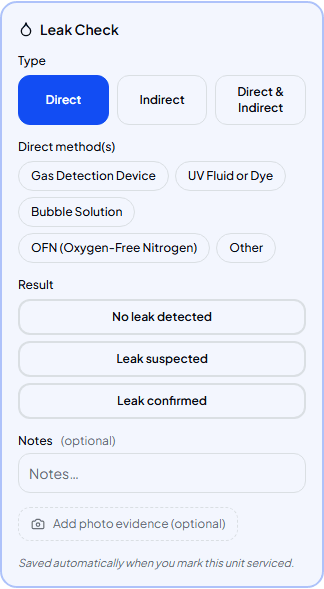
Open the Leak Check panel
Outdoor units show a Leak Check panel above the regular checklist. Choose Direct, Indirect, or both, depending on how you're checking this visit.
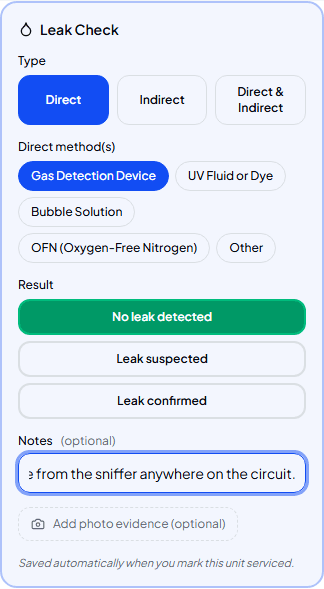
Record method, result and notes
Tick every method you actually used, set the result, and add notes — required whenever a leak is suspected or confirmed, optional otherwise. A photo can back up what you found.
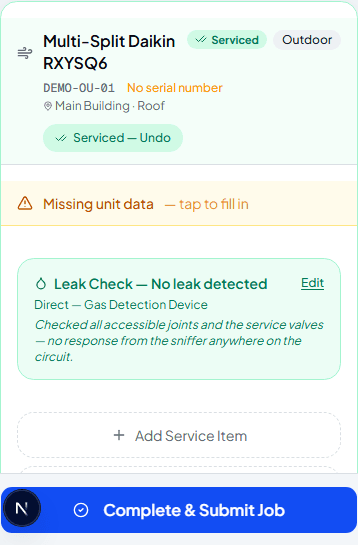
Mark the unit serviced to save it
There's no separate save button — marking the unit serviced saves the leak check at the same time. An incomplete leak check blocks Mark Serviced until you finish it or clear it, so nothing you've started gets lost.
Frequently asked
What happens if I suspect or confirm a leak?
Notes become required so you can describe what you found, and the result is carried through to the admin side for review alongside the rest of the job.
Can indoor units have a leak check too?
No — the Leak Check panel only appears on outdoor units, since that's where the refrigerant circuit's charge is tracked.
Can I change a leak check after I've saved it?
Yes, while the job's still yours to edit — an Edit link sits next to the saved summary on the unit.
Experience Climexa with a free 30-day trial.
See how installation, commissioning, servicing, compliance and customer reporting work together in one platform.
- 30-day free trial
- No credit card required
- Full platform access